(Under development – Initial Testing)
This is a simple procedure for VRAM chip reballing. I have tested this process once and luckily it was successful! Reballing is no ‘quick fix’, it takes patience to Shephard all the little balls into the holes and not lose too many in the process! However, it is satisfying when it works and I would imagine the process gets a bot quicker and less tedious with experience.
Why Reball?
- Allows reuse of VRAM chips from other cards. If you’re patient, this could save you money.
- If a VRAM chip replacement has gone wrong (e.g. short), reballing allows you to reuse the chip.
- A potentially longer term alternative to reflowing VRAM chips (assumes the the VRAM chip is in good condition and only has an issue with faulty solder ball joints)
Tools
- Hot air station
- Flux
- Soldering iron & solder wick (to clean the chip)
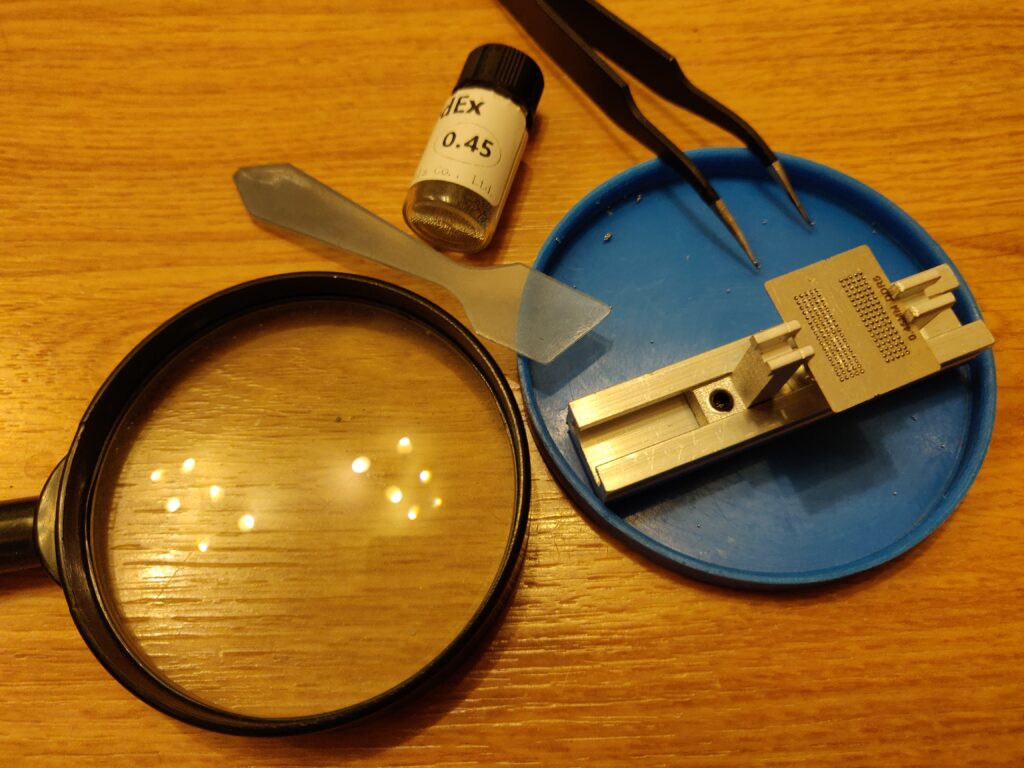
- Stencil, jig and solder balls (see below, DDR5 stencil and 0.45mm 60-40 lead solder balls)

- First clean the VRAM chip using some leaded solder and solder wick. When done clean the pads with IPA (it can help to warm the chip a bit with the hot air to flow the flux and clean). It’s important to get most of the solder off the pads to reduce the chances of solder balls fusing later.
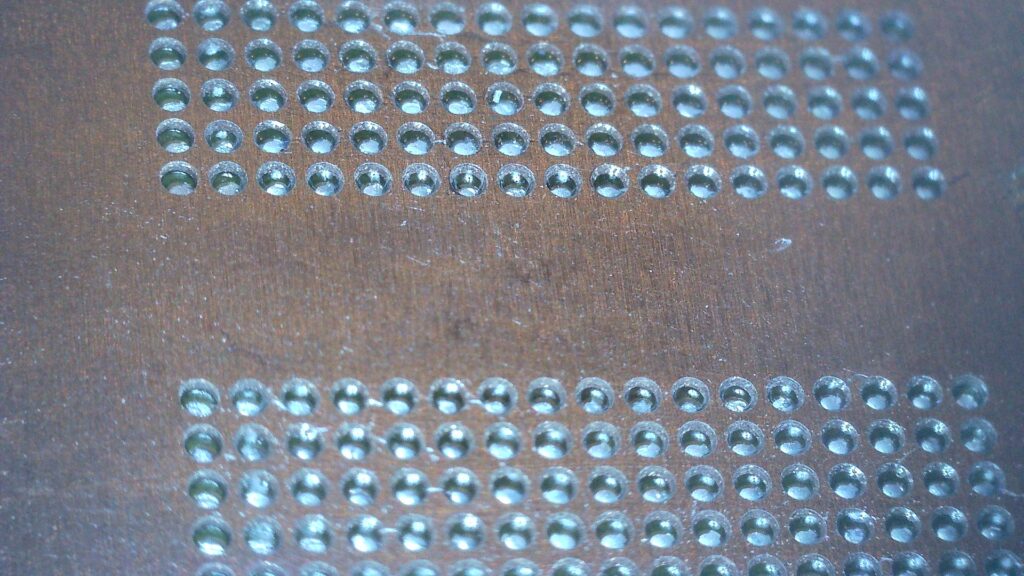
2. Next, add a thin layer of flux to the chip and fit the stencil. Obviously, try to get the alignment as close as possible. It doesn’t seem too hard, as the stencil seems to help. Once aligned, place the stencil and chip sandwich into the jig.
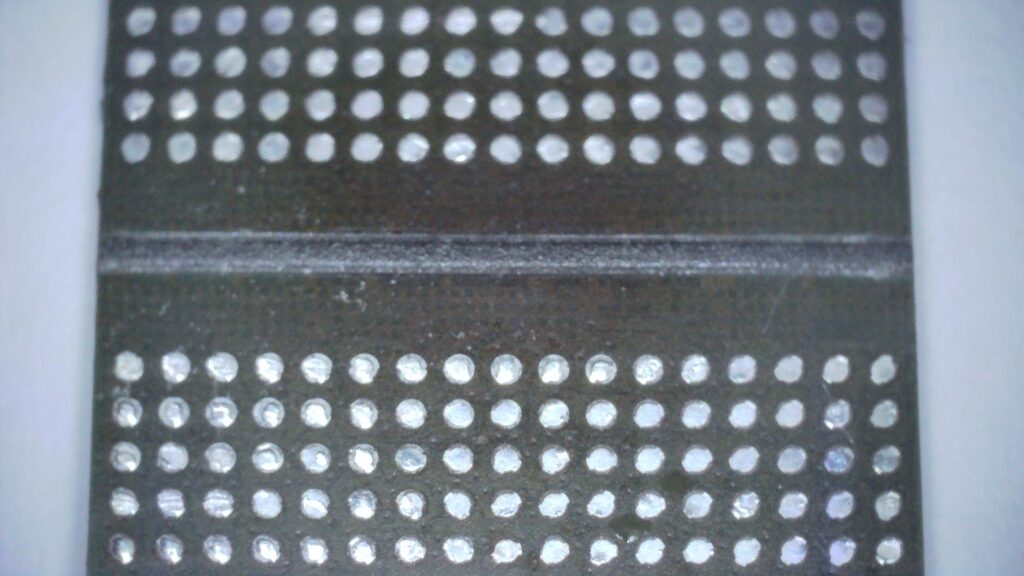
3. Next comes the somewhat tedious or therapeutic part (depending on how you feel about it). I am sure there will emerge more efficient ways of approaching this, but I simply used a small plastic dish to catch the excess balls that spill off the stencil as you spread them about. In the end, I don’t think I wasted that many and I found using the plastic spreader easier than the tweezers (seems to stick). Lastly, check that every hole has a ball safely in it – a magnifier or microscope helps with this.
4. Now time to solder the balls to the chip using hot air. Start slow, then close in, working around the stencil with the hot air. You may notice the little balls shimmy into place and look more uniform. Be careful not to overheat the chip. When done, allow the stencil and chip to cool down.
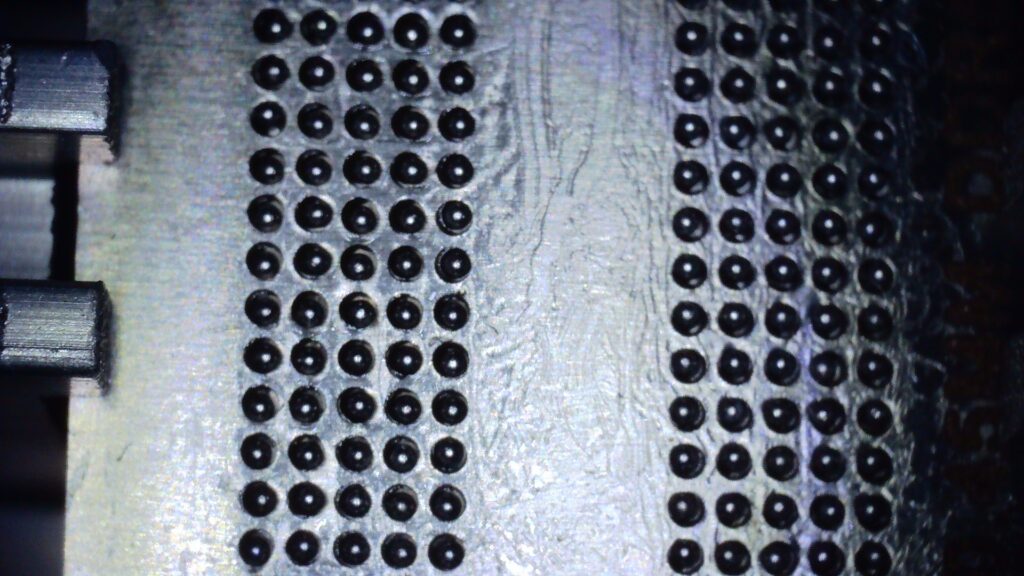
5. Finally time to get the hopefully finished chip. I must admit, I found it a bit tricky to separate the now stuck on the stencil from the chip – some IPA seemed to help pry them apart, it’s tempting to use force, but this could bend the stencil. Lastly, time to clean up the chip with some IPA. As you can see below, mine still looks quite messy, but more importantly, all the balls are firmly attached and this chip went on to work!
